Designing for 3D printing feels like a closed club. You see amazing prints online. You have your own ideas. Then you open professional 3D software. The interface is a maze of tools. The learning curve looks like a cliff. Most people close the software here. Their idea stays an idea.
There is a different way. You do not need to become a 3D artist. The new approach skips the complex software. It starts with what you already understand: a picture and plain language. Your job is not to manipulate polygons. Your job is to give clear direction. The rest can be handled by modern AI tools built for creation, like Neural4D.
This is a practical guide. We will walk through the steps of this new workflow. You will see how to go from a simple image to a ready-to-print 3D file. No prior experience required.
The New Workflow: 3 Steps to a Printable Model
Forget months of training. The process now has three clear stages. Your focus shifts from software mastery to creative decision-making.
Step 1: Start with Your Visual Brief
Every good design starts with a reference. In the past, this meant hand-drawn sketches. Now, it can be any image that captures your vision.
Find a clear photo or drawing. It should show the object from a helpful angle. This image is your project’s North Star. For example, if you want to print a custom phone stand, find an image that shows the shape and angle you like. This step requires no special skill. It requires your eye for what you want.
Step 2: Generate the 3D Foundation
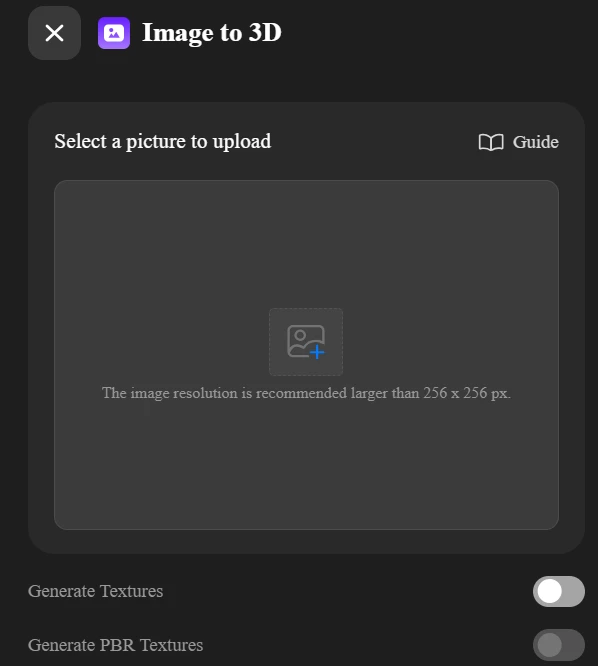
This is where the technical barrier disappears. Take your reference image and upload it to an AI platform that can turn 2D image into a 3D model.
Platforms like Neural4D analyze the image. In minutes, they construct a volumetric, three-dimensional base model. You are not getting a flat image. You are getting a real 3D object you can immediately rotate and inspect. This step converts your visual idea into a digital sculpt. It handles the complex geometric lifting you didn’t want to learn.
Step 3: Refine with Instructions, Not Tools
The first AI pass gives you a draft. Now you become the director. This is the true design phase.
Instead of learning sculpting brushes, you use a chat function (https://www.neural4d.com/n4d-2o). You describe the changes you want. Point to specific areas. Use natural language.
- “Thicken the base for more stability.”
- “Smooth out the rough edges on the left side.”
- “Add a simple pattern for better grip.”
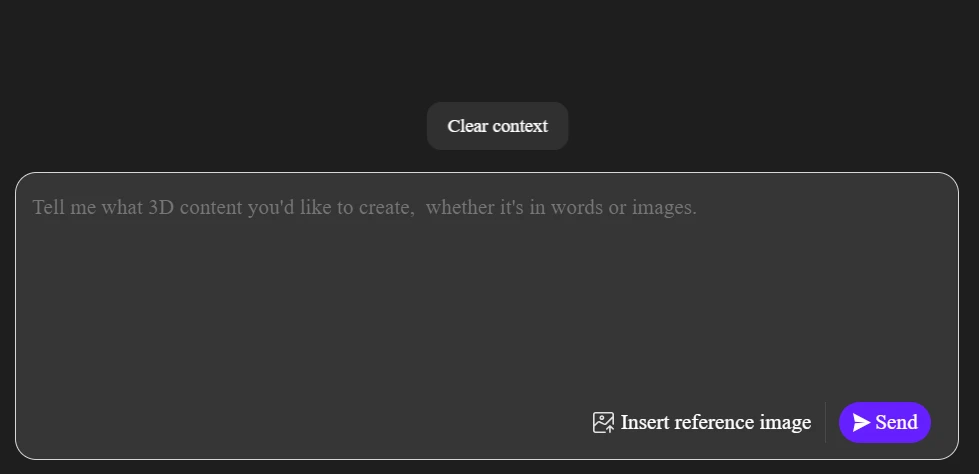
The AI interprets your intent and edits the existing model. You see the changes in near real-time. This iterative dialogue is the core of modern design. You solve functional and aesthetic problems through conversation. Your expertise is in the vision, not the software command.
The Critical Step: Ensuring Print Readiness
A beautiful 3D model on screen can still fail on the print bed. Common issues include non-manifold edges (holes in the mesh) or walls too thin to print.
This is a key advantage of starting with an AI tool engineered for manufacturing. Systems like Neural4D are built to output watertight, structurally coherent models by default. They significantly reduce the “cleanup” phase that often follows traditional 3D modeling.
Your final step is universal:
- Export your approved design as a high-resolution STL file.
- Import this file into a slicing application (like Ultimaker Cura or PrusaSlicer).
- Configure your print settings (layer height, infill) for your specific printer and material.
Because your starting model is sound, this final stage is about optimization, not repair.
What Can You Design This Way?
The method is versatile. Your starting image defines the project.
- Custom Hardware: Take a photo of a unique wall bracket you need. Generate and thicken it for strength.
- Personalized Gifts: Use a company logo or handwritten signature image. Generate it as a raised relief for a keychain or plaque.
- Functional Prototypes: Sketch a concept for a tool handle on paper. Snap a photo, generate it, and refine the ergonomics through conversational edits.
- Educational Models: Use a diagram of a molecule or a historical artifact. Transform it into a tactile learning aid.
The limit is your reference library and your ability to describe improvements.
Your Design Mindset is the Tool
The barrier to 3D print design is no longer technical knowledge. The barrier is not starting.
Professional software will always have its place for extreme precision. But for the vast majority of personal, prototype, and creative projects, the paradigm has shifted. Your value is not in mastering a toolbar. Your value is in your observation, your intent, and your decision-making.
The process now is clear: Find your image. Generate your draft. Refine with words.
Find something you want to hold in your hand. Use the technology that bridges the gap between your idea and the physical world. Your first design is closer than you think.