How to Implement Pagination in React
React is a free and open-source front-end JavaScript framework for developing user interfaces. Any online resource can serve as a user interface, whether a webpage or a web application. Our website or web service may include a lot of content to help visitors find material and prevent our pages from being overloaded with content. Pagination is thus necessary. If you want to hire react js expert available throughout your time zone then connect with Bosc Tech Labs.
Pagination: What Is It Then Why Is It Significant?
The practice of breaking up the material of a website into several pages containing related content is known as pagination. The first-page load is quicker than when all the material UI is loaded at once, which enhances the user experience.
Pagination is a great way to break website information into individual pages, making it easier for visitors to discover the specific page or material they’re looking for. This function may be used to disperse material across numerous pages on a personal blog, a product description, or just about any page with such a lot of content.
Pagination in React
Since React pagination requires some logic, it might take some time to implement. In this article, we’ll examine the starting-from-scratch method and the use of a React package for implementing this logic.
Let’s develop a mini-project using Hygraph wherein we take a lot of data and split it into numerous pages with a fixed amount of information per page before adding pagination.
Setting Up a Blog Page
A page listing blog entries and a link to where we may read them would be made. This may be the greatest approach to combine all of an author’s work published on many platforms into one blog page so that it is easier for readers to access, for instance.
We’ll quickly discuss the app’s development because this post is about pagination; if you want to see the code base, you can access it at this GitHub. Here is a direct link so you can check it out as well.
Building Markup Page – App.js
Without intermediate devices, we would process all functionality and show all of our material in our App.js; but, based on your needs, you may decide to divide this into elements. The markup appears as follows:
Obtaining Information from Hygraph
React uses **graphql-request** for querying, thus before we can use React, we must first install the dependencies by executing the command below:
npm i graphql-request
We will integrate it into our App.js file when it has been installed so we can query the Hygraph breakpoint:
import { request } from ‘graphql-request’;
Querying with GraphQL in React
At this point, it is assumed that we have our Hygraph endpoint and our GraphQL query; my query looks like this:
{
posts {
id
title
excert
postUrl
cover {
url
}
datePublished
author {
firstName
profilePicture {
url
}
}
}
}
At this point, this is what our React app – App.js would look like:
import React, { useState, useEffect } from ‘react’;
import { request } from ‘graphql-request’;
const App = () => {
const [blogPosts, setBlogPosts] = useState([]);
useEffect(() => {
const fetchBlogPosts = async () => {
const { posts } = await request(
‘https://api-us-east-1.hygraph.com/v2/cl3zo5a7h1jq701xv8mfyffi4/master’,
`
{
posts {
id
title
excert
postUrl
cover {
url
}
datePublished
author {
firstName
profilePicture {
url
}
}
}
}
`
);
setBlogPosts(posts);
};
fetchBlogPosts();
}, []);
return (
<div className=”container”>
<div className=”title”>
<h1>Blog</h1>
</div>
{blogPosts ? (
<div className=”blog-content-section”>
<div className=”blog-container”>
{blogPosts.map((blogPost) => (
<div className=”blog-post” key={blogPost.id}>
<img className=”cover-img” src={blogPost.cover.url} alt=”” />
<h2 className=”title”>{blogPost.title}</h2>
<p className=”description”>{blogPost.excert}</p>
<div className=”card-details”>
<div className=”lh-details”>
<img
className=”author-img”
src={blogPost.author.profilePicture.url}
alt=””
/>
<p className=”date”>
{new Date(`${blogPost.datePublished}`).toLocaleDateString(
‘en-us’,
{
year: ‘numeric’,
month: ‘short’,
day: ‘numeric’,
}
)}
</p>
</div>
<a
href={blogPost.postUrl}
target=”_blank”
rel=”noopener noreferrer”
className=”read-more”
>
Read post
</a>
</div>
</div>
))}
</div>
</div>
) : (
<div className=”loading”>Loading…</div>
)}
</div>
);
};
export default App;
Note: Change the API Gateway and perhaps the query using your own, and if desired, fiddle with the UI.
We now have all of the material that we used to create the Hygraph database on our app; if there were up to 100, it may be too much to download all at once. Let’s break this up into numerous pages using pagination now.
Pagination implementation in React
To utilize the slice() function to make sure that just the following material is shown, we would be required to produce and collect certain information that we would be required to perform this pagination, including the majority of the comments per page and also the position of both the initial and final posts of a particular page.
import React, { useState, useEffect } from ‘react’;
import { request } from ‘graphql-request’;
const App = () => {
const [blogPosts, setBlogPosts] = useState([]);
const [currentPage, setCurrentPage] = useState(1);
const [postsPerPage] = useState(3);
// …
const indexOfLastPost = currentPage * postsPerPage;
const indexOfFirstPost = indexOfLastPost – postsPerPage;
const currentPosts = blogPosts.slice(indexOfFirstPost, indexOfLastPost);
return (
<div className=”container”>
{/* … */}
</div>
);
};
export default App;
Note: We eliminated the useEffect() and markup to make the code simpler to read. I’ll be doing something similar throughout this essay, so if you get lost, just go back to this repository.
We established two states in the code above: one to save the current page and yet another to store how many posts we want to show each page. We just divide the entire amount of material by the number of postings per page, which we shall calculate in a moment, to obtain the total number of pages.
We also made variables to record the initial and final post indices on a page. For instance, the indexOfLastPost of page 2 will be 6 and the indexOfFirstPost will be 3 if we wish to display three entries per page.
Make sure to switch the array’s name from blogPosts to current posts or to whichever variable you chose to hold the spliced array now that you’ve used the splice() technique to assist you to retrieve the material you want to display on each page.
The following occurs to the information on that page when the current Page’s condition value is changed:
To make it easier for people to browse across these pages, we now need to add a page number to the bottom of our page.
This may be done manually by writing a component that handles all the logic or automatically by downloading a package that does it all for us. In this post, we’ll examine both possibilities, but let’s start by manually handling it by making a paginate.js component.
Page-turning element
PostsPerPage and total posts are the two properties we would now get from the App.js element (parent element) in the pagination component. This information will help us calculate the overall number of pages in our material.
We will make an unfilled array to keep the reference list from the loop after getting this data:
import React from ‘react’;
const Paginate = ({ postsPerPage, totalPosts }) => {
const pageNumbers = [];
for (let i = 1; i <= Math.ceil(totalPosts / postsPerPage); i++) {
pageNumbers.push(i);
}
return (
<div className=”pagination-container”>
{/* … */}
</div>
);
};
export default Paginate;
Essentially, the code above loops through the based on the number of pages to get the numbers as 1,2,3… and then pushes it to an array that we can now loop through in our app:
import React from ‘react’;
const Paginate = ({ postsPerPage, totalPosts }) => {
const pageNumbers = [];
for (let i = 1; i <= Math.ceil(totalPosts / postsPerPage); i++) {
pageNumbers.push(i);
}
return (
<div className=”pagination-container”>
<ul className=”pagination”>
{pageNumbers.map((number) => (
<li key={number} className=”page-number”>
{number}
</li>
))}
</ul>
</div>
);
};
export default Paginate;
Our software’s page numbers are now clearly apparent. The next step is to provide a click event for the page numbers so that we may modify the current page state. Like a prop, this method would be handed down from the parent entity (App.js) as follows:
// Navigate.js
import React from ‘react’;
const Paginate = ({ postsPerPage, totalPosts, paginate }) => {
const pageNumbers = [];
for (let i = 1; i <= Math.ceil(totalPosts / postsPerPage); i++) {
pageNumbers.push(i);
}
return (
<div className=”pagination-container”>
<ul className=”pagination”>
{pageNumbers.map((number) => (
<li
key={number}
onClick={() => paginate(number)}
className=”page-number”
>
{number}
</li>
))}
</ul>
</div>
);
};
export default Paginate;
The page number button now has a click action, and a function that receives the reference number and sends it into the App.js element has also been added:
import React, { useState, useEffect } from ‘react’;
import { request } from ‘graphql-request’;
import Paginate from ‘./Paginate’;
const App = () => {
const [blogPosts, setBlogPosts] = useState([]);
const [currentPage, setCurrentPage] = useState(1);
const [postsPerPage] = useState(3);
// …
const indexOfLastPost = currentPage * postsPerPage;
const indexOfFirstPost = indexOfLastPost – postsPerPage;
const currentPosts = blogPosts.slice(indexOfFirstPost, indexOfLastPost);
const paginate = (pageNumber) => {
setCurrentPage(pageNumber);
};
return (
<div className=”container”>
<div className=”title”>
<h1>Blog</h1>
</div>
{blogPosts ? (
<div className=”blog-content-section”>
{/* … */}
<Paginate
postsPerPage={postsPerPage}
totalPosts={blogPosts.length}
paginate={paginate}
/>
</div>
) : (
<div className=”loading”>Loading…</div>
)}
</div>
);
};
export default App;
You will notice we added this method, which helps us set the currentPage to the number received:
const paginate = (pageNumber) => {
setCurrentPage(page Number);
};
At this stage, clicking the buttons modifies the content according to the page:
switching between pages
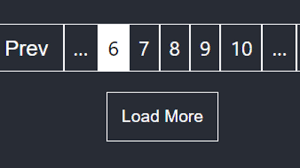
Pagination has so far been implemented using React. We should include Next and Prev (previously) icons even if it appears excellent and lets us browse all of our information. This is simple to accomplish, and afterward, just as before, we can add an onClick() event which will be managed by our parent component:
import React from ‘react’;
const Paginate = ({ postsPerPage, totalPosts, paginate, previousPage, nextPage }) => {
const pageNumbers = [];
for (let i = 1; i <= Math.ceil(totalPosts / postsPerPage); i++) {
pageNumbers.push(i);
}
return (
<div className=”pagination-container”>
<ul className=”pagination”>
<li onClick={previousPage} className=”page-number”>
Prev
</li>
{pageNumbers.map((number) => (
<li
key={number}
onClick={() => paginate(number)}
className=”page-number”
>
{number}
</li>
))}
<li onClick={nextPage} className=”page-number”>
Next
</li>
</ul>
</div>
);
};
export default Paginate;
In essence, we created two new lists that would appear both before and after the listing iteration, in addition to two events that our App.js page would respond to:
import React, { useState, useEffect } from ‘react’;
import { request } from ‘graphql-request’;
import Paginate from ‘./Paginate’;
const App = () => {
//…
const previousPage = () => {
if (currentPage !== 1) {
setCurrentPage(currentPage – 1);
}
};
const nextPage = () => {
if (currentPage !== Math.ceil(blogPosts.length / postsPerPage)) {
setCurrentPage(currentPage + 1);
}
};
return (
<div className=”container”>
<div className=”title”>
<h1>Blog</h1>
</div>
{blogPosts ? (
<div className=”blog-content-section”>
{/* … */}
<Paginate
postsPerPage={postsPerPage}
totalPosts={blogPosts.length}
paginate={paginate}
previousPage={previousPage}
nextPage={nextPage}
/>
</div>
) : (
<div className=”loading”>Loading…</div>
)}
</div>
);
};
export default App;
The next and prior (previous) icons will now function when we load our app, and they will cease to function when the max and min values are reached, as decided by the if statement we put in the methods.
Using the react-paginate package
The react-paginate program handles all the functionality for us, so all we need to do to utilize the component is install the package and supply the required data. The package itself takes care of the fundamental logic.
Installing the react-paginate package with the following command would be the first step:
Installing React Paginate with —save
We can import it and utilise it in this way after that is successful, and all will be fine:
import React, { useState, useEffect } from ‘react’;
import { request } from ‘graphql-request’;
import ReactPaginate from ‘react-paginate’;
const App = () => {
const [blogPosts, setBlogPosts] = useState([]);
const [currentPage, setCurrentPage] = useState(1);
const [postsPerPage] = useState(3);
// …
const indexOfLastPost = currentPage * postsPerPage;
const indexOfFirstPost = indexOfLastPost – postsPerPage;
const currentPosts = blogPosts.slice(indexOfFirstPost, indexOfLastPost);
const paginate = ({ selected }) => {
setCurrentPage(selected + 1);
};
return (
<div className=”container”>
<div className=”title”>
<h1>Blog</h1>
</div>
{blogPosts ? (
<div className=”blog-content-section”>
{/* … */}
<ReactPaginate
onPageChange={paginate}
pageCount={Math.ceil(blogPosts.length / postsPerPage)}
previousLabel={‘Prev’}
nextLabel={‘Next’}
containerClassName={‘pagination’}
pageLinkClassName={‘page-number’}
previousLinkClassName={‘page-number’}
nextLinkClassName={‘page-number’}
activeLinkClassName={‘active’}
/>
</div>
) : (
<div className=”loading”>Loading…</div>
)}
</div>
);
};
export default App;
ReactPaginate includes a onPageChange function that manages the essential logic of switching pages by altering the state of the currentPage state, as you’ll observe. ReactPaginate has an item with the value chosen that includes the page number, which is crucial to comprehend.
To style the page layout with the same CSS class labels as before, we also define the classes. To learn more about the package and other possible alternatives, consult their literature.
Retrieving all of our items before utilizing the splice function to display only the ones that meet the currentPage set has shown us how to React implementation may be handled thus far.
It becomes a terrible idea to acquire all the data at once, as we did before while dealing with real-world apps and retrieving material from an API like Hygraph since the site will sluggishly try to get thousands of data while just a handful will be displayed to the visitors at once.
Hypergraph uses the following inputs to make handling content pagination simple for us:
- Argument – Type – Definition
- first – Int – Seek forwards from the start of the result set.
- last – Int – Seek backward from the end of the result set.
- skip – Int – Skip result set by a given amount.
- before – String – Seek backward before specific ID.
- after – String – Seeks forwards after specific ID.
Our GraphQL query may accept these parameters to quickly show the desired data. For instance, we can use the following query to just display the first five data items from our content API:
posts (first: 5) {
id
title
}
Let’s now incorporate pagination into our application using some of these options. The relay specification will also be used to determine the pageSize (this is very important to calculate the pages and display page numbers as we have seen earlier). With the useEffect() hook, our schema will now appear as follows:
useEffect(() => {
const fetchBlogPosts = async () => {
const { posts, postsConnection } = await request(
‘https://api-us-east-1.hygraph.com/v2/cl3zo5a7h1jq701xv8mfyffi4/master’,
`
{
posts (first: ${postsPerPage}, skip: ${
currentPage * postsPerPage – postsPerPage
}) {
id
title
excert
postUrl
cover {
url
}
datePublished
author {
firstName
profilePicture {
url
}
}
}
postsConnection {
pageInfo {
pageSize
}
}
}
`
);
setBlogPosts(posts);
setTotalPosts(postsConnection.pageInfo.pageSize);
};
fetchBlogPosts();
}, [currentPage, postsPerPage]);
The first and skip parameters have been added, as can be seen by looking at the schema, to obtain precise data for each page. Additionally, we retrieve the pageSize from our postsConnection object using the relay specification.
As we can see, using the function setTotalPosts, we have already stored the pageSize value to the state (postsConnection.pageInfo.pageSize).
All that is left to do is make sure the paginate component receives the totalSize value and that the nextPage button’s condition is updated.
This GitHub Gist contains the modified code for our App.js file that uses Hygraph and React to enable pagination.
Note: In the GitHub repository, we also made 3 branches, each of which has links in the README file, holding the code for the 3 distinct approaches discussed in this post.
Conclusion
By handling all the code and utilizing the react-paginate package, we discovered how to construct pagination in our React application from scratch. You are free to use any of the approaches, but it’s crucial to keep in mind that adding a package expands the size of your project and may or may not affect how quickly it loads.