You can gradually improve your wireless network after completing the configuration of Wavlink AC1200 Wifi Extender. It’s incredibly small and convenient design enables for easy placement. Furthermore, its elegant form allows it to seamlessly mix in with your existing home or office decor.
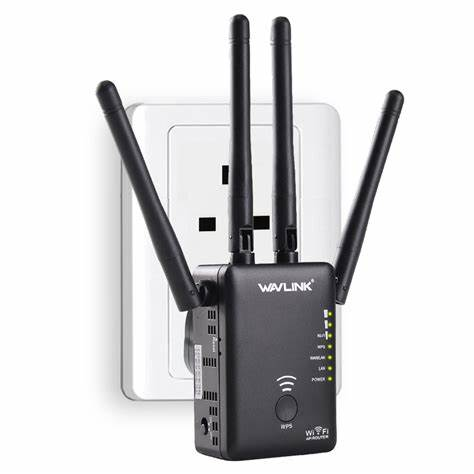
The Wavlink AC1200 Wifi Extender Setup allows you to quickly extend the range of your existing wireless network from anywhere. Four antennas are grouped in a proprietary omnidirectional design to increase the performance and dependability of your existing network. Because of the high-performance antennae, you can connect all of your devices from anywhere in your home. This addon also wirelessly connects to your wifi. As a result, it constantly monitors and optimises the signals of your router.
Wavlink AC1200 WiFi Extender Setup Using Manual Method
The Wavlink AC1200 Wifi Extender setup is straightforward and only requires the following steps.
- Connect your computer to the Wavlink AC1200 router via Ethernet cable.
- Open a web browser and type in the default IP address of the router, usually 192.168.0.1 in the address bar.
- Enter the default username and password to log into the router’s admin panel.
- To set up your internet connection, select “Quick Setup” and follow the on-screen directions.
- Configure your wireless network by setting up a network name (SSID) and password.
- Select the appropriate wireless channel and security mode for your network.
- Save your modifications and restart your router to see them take effect.
How Do I Install Wavlink AC1200 via WPS Method?
WPS is the easiest method for configuring the Wavlink AC1200 extender. You can easily set up your Extender by using the WPS method within couples for minutes.
Follow these steps for Wavlink AC1200 wifi Extender Setup through WPS method:
- Plug in the Wavlink AC1200 to a power outlet and turn it on.
- Press the WPS button on the router for 2-3 seconds until the WPS LED starts flashing.
- Within 2 minutes, press the WPS button on your device.
- Wait for the router and device to establish a connection.
- Once the connection is established, the WPS LED on the router will stop flashing and stay lit.
- Verify that your device is connected to the Wavlink AC1200 by checking the network settings.
- You can now use the Wavlink AC1200 to access the internet.
Common problems encountered during Wavlink AC1200 installation
Here are ten common issues that users might encounter during Wavlink AC1200 wifi extender setup:
- Incorrect physical connection: Ensure that all the cables are correctly connected to their respective ports.
- Device compatibility: Check whether your device is compatible with the Wavlink AC1200 router.
- Incorrect IP address: Make sure you have entered the correct IP address in the browser’s address bar.
- Forgotten password: If you have forgotten your router’s login password, reset it to the default settings.
- Firewall settings: Check whether the firewall settings are blocking the router’s access to the internet.
- Firmware update: Update the router’s firmware to the latest version to avoid any issues.
- Incorrect SSID and password: Verify that you have entered the correct SSID and password for your router.
- Signal interference: If you are experiencing a weak or unstable signal, try changing the channel or relocating the router.
- Duplicate IP address: Check whether there is a duplicate IP address assigned to your device.
- Hardware malfunction: If none of the above solutions work, there might be a hardware malfunction, and you should contact the manufacturer for assistance.
How to Fix Wavlink AC1200 Extender setup issues?
Sure, here are some troubleshooting tips for Wavlink AC1200 wifi extender setup issues:
- Check if the router is properly connected to the modem and the power source.
- Ensure that the router is placed in an open area and away from other electronic devices that may cause interference.
- Verify that your computer or mobile device is connected to the correct Wi-Fi network.
- Make sure you have entered the correct username and password for the router’s admin page.
- Restart the router and the modem by unplugging them and plugging them back in after a minute.
- By pushing and holding the reset button for 10 seconds, you can restore the router to its factory settings.
- Disable any firewall or antivirus software that may be blocking the setup process.
- Try to set up the router using a different web browser or device.
- If all else fails, contact Wavlink customer support for further assistance.
Wavlink AC1200 Extender Factory Reset
The process for resetting a Wavlink AC1200 Dual-band WIFI extender may vary slightly depending on the specific model you have, but generally, you can follow these steps:
- To reset the Wavlink AC1200, first connect it to a power source.
- Once the power led light on the extender is turned on.
- Look for a toothpick or a paperclip.
- Push and hold the reset button for 10-15 seconds before releasing the pinhole.
- Wait for the power led light to turn solid green once the light on the power led turns amber.
- You have now successfully reset the extender settings to factory defaults.
- To reinstall the WIFI extender, go through the Wavlink AC1200 wifi extender setup process.
If you are still having trouble configuring your Wavlink AC1200 Extender, please contact our expert for free help by Live chat or toll free number.