If you’re thinking about beginning a lash business, you should learn about the many types of extensions available. How to use flat lashes mixed tray is a topic that we are going to talk about here.
- How to ready clients for the application of flat lashes mixed tray

The most significant component of applying lash extensions is preparation. If the client is well prepared, the application procedure will go smoothly.
Before beginning your lashing procedure, make sure to give a full consultation to identify the style, length, curl, and thickness your client wishes to achieve.
Remove all eye makeup with a liquid cleanser before applying eyelashes, and then dry with a lint-free towel. You will have more time to deal with a client’s eyelashes if they have a clean face. Curling eyelashes are not suggested. Working on the eyelashes while they are in their natural state is preferable.
Contact lenses must all be removed during the lashes application to minimize irritation and eye injury.
Caffeine-containing beverages can cause eyelids to twitch, making applying eyelashes difficult. Excessive eye movement might result in incorrect extensions.
Limit your clients’ liquid consumption. It is advised that your clients do not use the toilet frequently.
A discussion about the client’s allergies before the appointment would help perform the procedure more smoothly.
Clients can listen to music or a podcast while relaxing during their appointment. They must put their phone in silent mode to minimize distraction and reading text messages. Every client should keep their eyes closed during the session for their own safety.
A fill session usually occurs from 40 minutes to an hour, while a complete extension takes 2 to 3 hours. Inform your clients that they should wear comfortable attire.
- How to apply flat lashes mixed tray

Step 1: Make sure the client’s eyes are clean.
Cleaning the lashes is necessary to keep the glue that holds the extensions in position from breaking down due to oil and makeup.
Step 2: Gently apply the under-eye patches.
Take your time when putting on lash patches. Pay attention to your isolation tweezers for eyelash extensions. In most cases, their points should not come into contact with the eye pad. It is always ideal for detecting two or three lower lashes protruding out or even bonded together early on.
Step 3: Create an eyelash set for your client.
Lash mapping also saves time by allowing you to generate the appropriate variety of lash extensions with less time and return to your lash mapping at any moment.
Step 4: Dip the eyelash into the adhesive slowly.
Dip the tapered end of the extension into the glue while holding it by its tapered end to get the perfect balance of too much and too little adhesive. Make sure you use the correct quantity of retention to avoid problems.
Using the flat lashes mixed tray isn’t the same as using the others. To use them, you must use a certain approach. These lashes, unlike conventional lashes, cannot be linked to the sides of the lashes. Instead, apply them on your lashes above, below, or at the base of your natural lashes. Apart from that, these lashes don’t require much adhesive. You can get away with using very little adhesive, and the results will last much longer.
Step 5: Applying lash extensions
Place the lash extension on the natural lash after swiping it with just enough adhesive to coat it around 1 mm from the eyelid. Then continue applying extensions to another location or the other eye until you accomplish your objective. By performing one by one, it would help to avoid your client’s lashes clumping up together.
Step 6: Separate lashes.
There should be no eyelash extensions or natural eyelashes that are stuck together. Separate any extensions that are bonded together with the two pairs of lash tweezers. Grasp and separate the pieces horizontally; this is best done even if the glue is dry but not fully hardened.
Step 7: Allow the lash glue to dry.
Allow 3 to 5 minutes for the freshly embellished lashes to dry once all lash extensions have been properly attached. If you wish to improve adhesive bond retention, use a super bonder to cure the adhesive bond. Dry the lashes using a lash fan. Allow 3 minutes for the distilled water to dry before inspecting for stickies again.

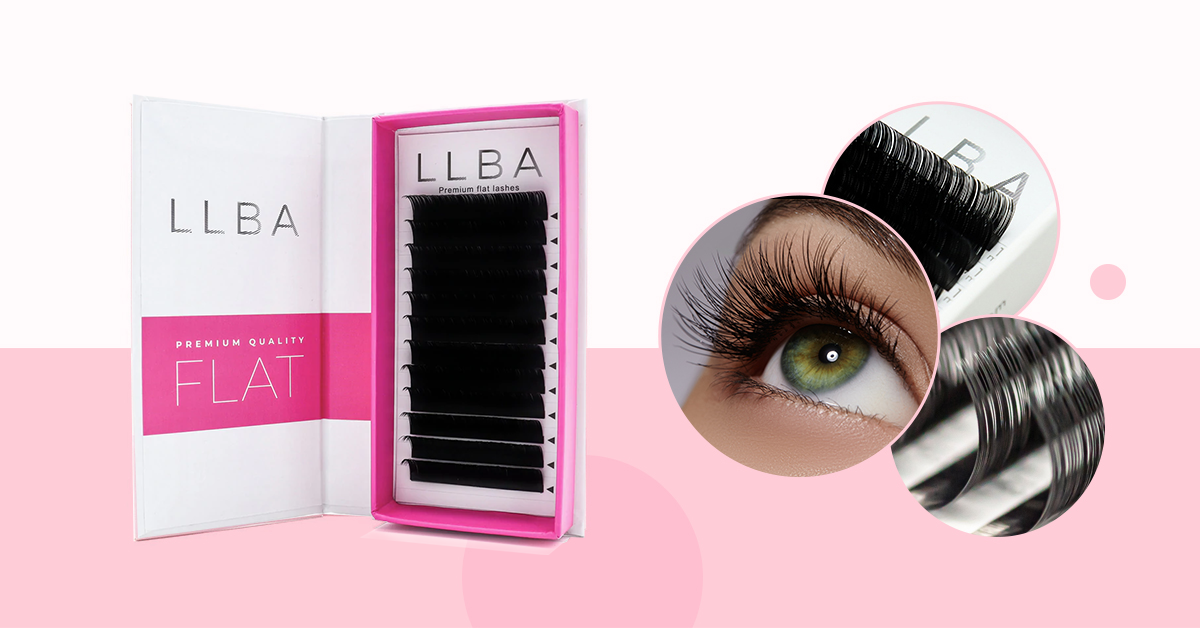
You’ll need excellent-quality eyelash extensions in addition to skilled skills to attain good results. One of them is the LLBA Professional flat lash. They have a broad touch area with actual eyelashes, are faster, and last longer. This item has a matte deep black finish that readily provides a complete and magnificent effect.
In recent years, flat lashes have become rather trendy. To improve your service offering, you need to keep up with this trend. Keep our pointers in mind while applying flat lashes mixed tray to give your clients the appearance they desire.