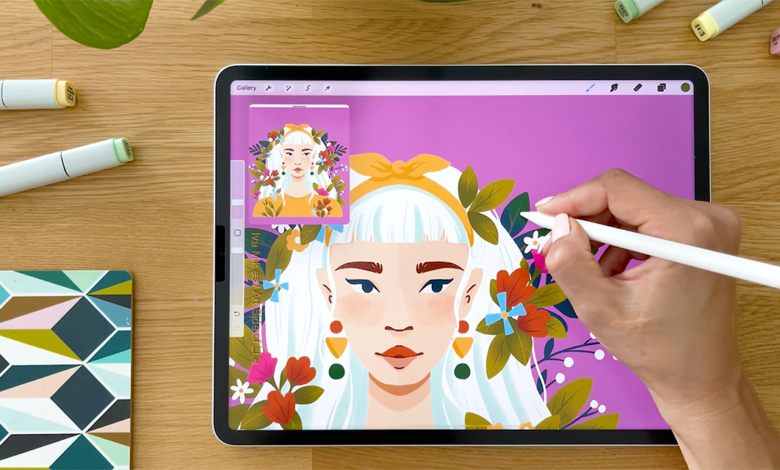
Procreate, a popular digital illustration app, has taken the art world by storm with its powerful features and user-friendly interface. While renowned for its static artwork capabilities, Procreate also offers robust animation tools, enabling artists to bring their creations to life through captivating animations. In this comprehensive guide, we will delve into the world of Procreate animation, exploring its features, workflow, and techniques. Whether you are a seasoned digital artist or a beginner eager to venture into animation, this guide will equip you with the knowledge and skills to create dynamic and mesmerizing artworks using Procreate’s animation tools.
Getting Started with Procreate Animation
To begin your journey into Procreate animation, you must first ensure that you have the latest version of Procreate installed on your iPad. Procreate’s animation feature is available for iPadOS 13.2 or later. If you have an older version, update your app to access the animation tools.
Understanding Animation Assist
Procreate’s Animation Assist is the heart of its animation capabilities. It allows you to create and manage animation frames, adjust frame durations, and preview your animation in real-time. To access Animation Assist, tap on the “Actions” menu, then select “Canvas” and finally “Animation Assist.” Once activated, you’ll see a timeline at the bottom of the screen, showing your animation frames.
Creating Animation Frames
To create animation frames, tap the “+” button on the Animation Assist timeline. Each frame represents a single instance of your artwork, and multiple frames form the animation sequence. You can duplicate, delete, and reorder frames to fine-tune your animation.
Drawing and Animating on Layers
Animation in Procreate is achieved by making changes to individual layers in each frame. To animate a layer, ensure that the layer is unlocked for animation by tapping the layer thumbnail and selecting “Lock Transparency.” This allows you to draw only on the visible content of the layer during animation. Make changes to the layer in each frame to create smooth animation transitions.
Onion Skinning for Fluid Animation
Procreate offers onion skinning, a powerful feature that displays previous and subsequent frames as semi-transparent outlines on the canvas. Onion skinning helps you visualize the flow of movement and maintain consistency in your animation. To enable onion skinning, tap the “Onion Skin” button in Animation Assist and adjust the opacity and range settings to your preference.
Using Animation Assist Guides
Animation Assist Guides are horizontal and vertical lines that you can set as references for the position of objects or characters in your animation. These guides help you maintain alignment and consistency across frames. To add guides, tap the “Guides” button in Animation Assist, and drag the guide handles to your desired positions.
Adjusting Frame Duration
Each frame in your animation has a duration, indicating how long it will be displayed when the animation plays. To adjust the frame duration, tap on the frame in the timeline and use the slider to set the desired duration. Varying frame durations can create dramatic or subtle animation effects.
Playback and Preview
Procreate offers various playback options to preview your animation. You can play the animation forward, backward, or loop it. Additionally, you can adjust the playback speed to view the animation at different rates. Previewing your animation in real-time allows you to make adjustments and refine your artwork.
Exporting Your Animation
Once you have completed your animation, you can export it in various formats, including GIF, MP4, or PNG sequence. Choose the export option that best suits your intended use. For sharing on social media or websites, GIF or MP4 formats are ideal. For further editing or post-processing, a PNG sequence provides individual frames for manipulation.
Tips for Creating Stunning Procreate Animations
1. Storyboarding: Before diving into animation, create a storyboard or a rough sketch of your animation sequence. This will help you plan the flow and composition of your animation.
2. Use Layers Wisely: Utilize layers strategically to separate elements that need to move independently. This allows for more complex and dynamic animations.
3. Frame Timing: Experiment with frame timing to control the speed and rhythm of your animation. Varying frame durations can add impact and emphasis to certain movements.
4. Embrace Smears and Blurs: To achieve smooth motion, consider incorporating smear frames and motion blur. Smears are exaggerated shapes that indicate the direction of movement, while motion blur adds a sense of realism to fast movements.
5. Timing and Spacing: Pay close attention to the timing and spacing of your animation. Understanding these principles will result in more natural and fluid movements.
6. Save Incrementally: While working on your animation, save your progress regularly under different file names. This allows you to revisit previous versions if needed and prevents losing hours of work due to accidental mistakes.
7. Seek Feedback: Share your animations with fellow artists or online communities to receive constructive feedback. Feedback can offer valuable insights and help you refine your animation skills.
Inspiring Procreate Animation Styles
Procreate animation is a versatile medium that lends itself to various artistic styles and techniques. Here are a few animation styles to consider exploring:
1. Traditional Animation: Embrace the classic style of hand-drawn animation, where each frame is created manually. This style is rich in charm and allows for meticulous attention to detail.
2. Motion Graphics: Utilize Procreate’s powerful vector capabilities to create vibrant and dynamic motion graphics. This style is perfect for animations with a graphical and modern aesthetic.
3. Stop Motion: Simulate the look of stop-motion animation by creating distinct frames with subtle variations. This style can add a tactile and playful quality to your animation.
4. Cinemagraphs: Combine still images with subtle animation to create cinemagraphs, which are captivating and surreal visual delights.
5. Animated Illustrations: Animate your static illustrations to add an extra layer of depth and storytelling to your artwork.
Conclusion
Procreate animation opens a world of possibilities for digital artists, providing a dynamic and engaging platform to bring their artwork to life. Whether you are a seasoned animator or a beginner eager to explore animation, Procreate’s animation tools and features offer an intuitive and powerful experience. By understanding Animation Assist, mastering onion skinning, and experimenting with frame timing and spacing, you can create mesmerizing and captivating animations that leave a lasting impression on your audience. So, dive into the world of Procreate animation fearlessly, and let your creativity soar as you embark on an artistic journey filled with boundless potential and dynamic storytelling.