Are you using your family coffee maker, blender, or vacuum in your camper? The easiest way is to use an inverter, a voltage converter. This converts the 12V DC from the camper’s onboard battery to 230V AC. So you can plug all your appliances into the outlets like at home. However, to ensure that everything works, there are a few things to consider when choosing an inverter. What should we pay attention to when buying an inverter, and which inverter did we choose? The information is loaded here for you!
Do you need camper inverter?
Before you start looking for the right inverter, ask yourself: are you sure you need an inverter for your camper? Of course, using all the equipment at home in a camper is nice. But the installation and use of inverters also have some disadvantages. Many devices can also run on 12V with a suitable adapter. With laptops, smartphones, and other batteries, this is usually not a problem. Therefore, without an inverter, the cost and effort of expansion can be saved, and a lot of electricity can also be saved. Inverters, and many of the devices that run on them, are small power consumers.
Consider the following points if you still don’t want to live without a voltage converter. 230V is used here. A tense situation that can quickly become life-threatening. Therefore, since 2020, a separate certification, VDE test, must be carried out for 230V installations. We’ve also been considering whether having a power inverter in our camper makes sense. In the end, we decided to go for it. We need the flexibility to work on different devices to work from anywhere. So far, we have not regretted this decision. However, we may grow a few gray hairs while installing the inverter.
Pros and Cons of Installing an Inverter in a Camper
Pros:
- Household appliances such as vacuum cleaners and coffee machines can also be used in the camper
Cons:
- A very powerful (at least 1500W) inverter is required to use household appliances.
- Inverters consume a lot of power, even when idle.
- The battery’s life may be shortened if a high current is consumed (inverter usage).
- Installing 230V is dangerous and should only be done by an electrician.
- 230V VDE test required
- Relatively high procurement, commissioning, and testing costs
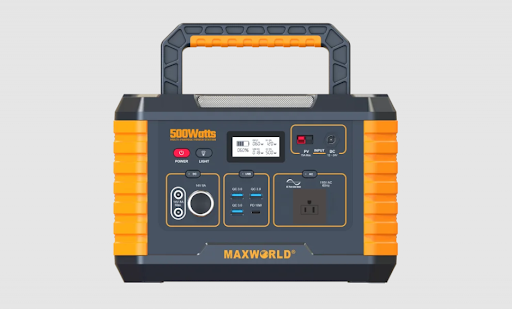
We finally decided to compromise and installed a very small inverter, only 500W. That’s enough to operate our laptop, various battery types, and a small hand blender. However, it’s too small for high-power-hungry appliances like hair dryers, coffee makers, or toasters; generally, all appliances generate heat.
Which inverter do I need?
The market is flooded with inverters of all types, price categories, and performance levels. In the jungle of products, it’s easy to get lost. Which inverter is right for you? It all depends on what equipment you want to operate on the inverter and how big your power reserves are. Can you already answer the following questions?
- What equipment do I want to operate on the inverter?
- How many watts are these devices?
- What is my battery capacity?
- Sine wave inverter or modified sine wave inverter?
The inverter turns the 12V from the AGM car battery into 230V AC. But not every inverter can produce a pure sine wave-like shore power. Therefore, voltage converters can be divided into sine wave inverters, which produce pure sine waves, and modified sine wave inverters, which produce very angular “waves.” The latter are less complex in functionality and are, therefore, of course, much cheaper. But not every device can handle this modified sine wave. It would help to use a pure sine wave inverter to operate complex technical equipment on a voltage converter.
Alternative to fixed inverters
We chose inverters mainly because of remote work. But before we installed a stationary sine wave inverter, we used only a small, mobile mug-sized inverter for years. These live up to their reputation and are cheap. The only downside: These inverters usually only provide a modified sine wave. But it’s never been a problem with our MacBook and camera batteries. A mobile inverter is a good choice for those who want to save on the cost and hassle of installing a stationary inverter. This inverter does not require complex 230V installations and therefore does not require VDE testing. However, due to the limited power of this type of inverter, it can only draw a maximum of 300W. Even so, the fans are loud, but so far, it’s never bothered us.
Do not use the inverter within the power limit
You should not run your inverter permanently at its performance limit, if possible. Because the fan not only makes a lot of noise but also shortens the life of the inverter. Since most devices require a fairly high starting current when turned on, you should oversize your inverter.
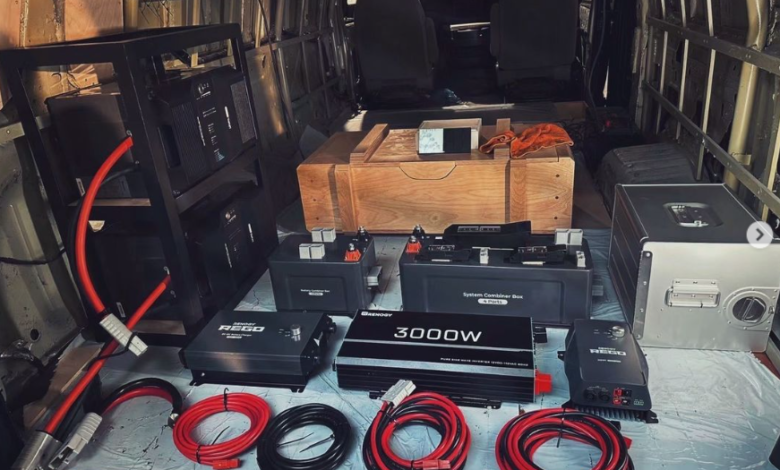
Installing an Inverter in a Camper
Once you decide to buy an inverter, the next hurdle comes. The inverter must now be connected to the battery.
Disconnect the battery
The battery must be disconnected before starting the installation. As always, it is important to observe the disconnect sequence. Always disconnect the negative first, then the positive. When connecting, the procedure proceeds in reverse order. If you do it the other way around, you run the risk of short circuits. When the negative pole is still connected to the body, you accidentally touch the body with a tool while operating the positive pole.
Mount as close to the battery as possible
Due to the extremely high current flowing from the battery to the inverter, the cables between these two components should be as short as possible. Manufacturers usually specify a cable length of approximately 30 cm. This should also be respected if possible. Otherwise, the losses in the cable will be greater. But also, from a safety point of view, the cable should be as short as possible. Note that the part of the wire between the battery and the fuse is not protected.
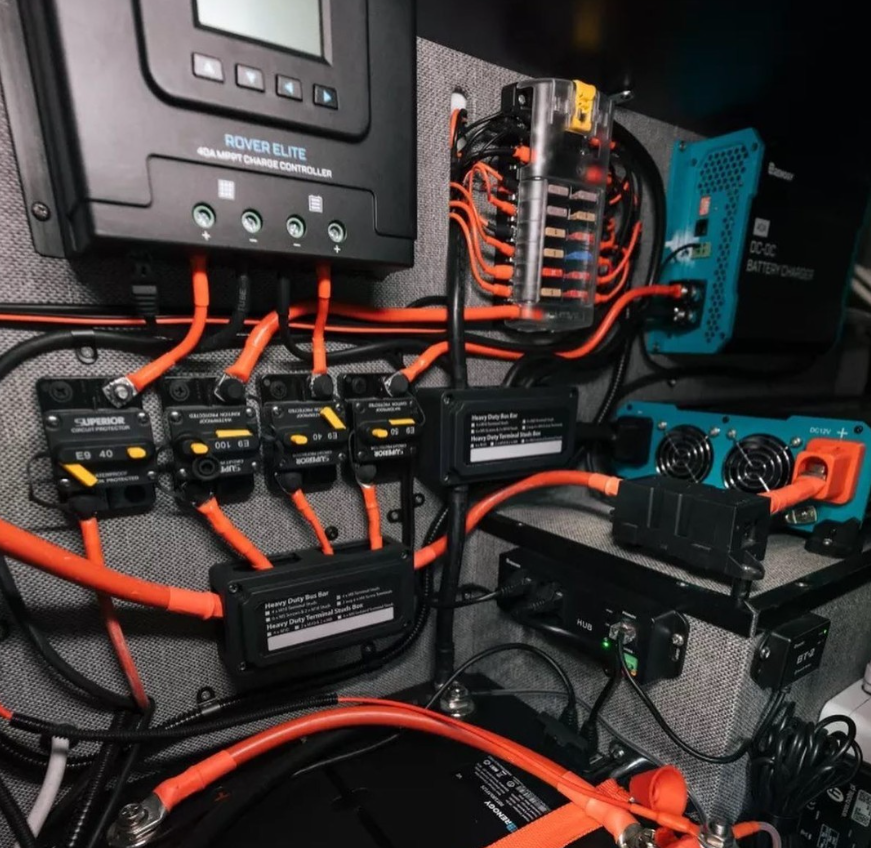
Correct cable cross-section
Since the inverter needs a lot of power, you must run extra thick cables between the battery and the inverter. For example, for our 500W inverter, we have chosen a 35mm2 cable. We also used thick cables because our inverters handle up to 1000W starting current. Be sure to consider this when choosing cables for your inverter, and when in doubt, always choose slightly thicker cables. For 1000W, about 83 amps will flow through the cable (calculation: 1000W / 12V = 83A). According to VDE guidelines, you need at least one 25mm 2 cables.
Crimp a tubular cable lug onto the end of the cable
To connect the cables to the battery, inverter, and fuses, so-called tubular cable lugs must be attached to the ends. But this is easier said than done when using cables larger than 6mm2. One thing’s for sure: It takes a lot of force to securely attach such a thick cable lug to a cable. You won’t get very far with a small crimping tool. Very large leverage is required! However, our experience has shown that even with large levers, muscular strength is insufficient. It would help if you didn’t take your luck with such strong currents.
Our advice: Always use hydraulic crimping tools! Things are worth the money. Crimping is as easy as a few simple steps, and your tubular cable lug is irreversibly and securely attached to the cable. Hydraulic crimping tools can be purchased for as little as €30. Or, of course, you can borrow these tools from a friend’s auto mech engineer or electrician.
Install a 12V fuse on the positive wire
The positive wire must be protected to protect the power circuit of the inverter and the battery. So-called midi backups are best suited for this situation. Of course, you’ll have to size these based on the power of the inverter and the strength of the cables. For your safety, placing this fuse as close to the battery as possible is especially important to minimize the risk of the cable catching fire. Remember that the part of the cable between the fuse and the battery is not protected!
Attach the inverter housing to the body
To protect the inverter from fault currents in the event of an internal fault, the case of the inverter must be connected to the body. To do this, use the connection provided on the inverter and the green-yellow cable of at least four mm2.
Inverter with battery charger
Many companies offer inverters with a variety of additional features. So, after extensive research, we decided to purchase a device that combines the functions of an inverter and a AGM battery charger in one housing. Since the battery charger is already the “counterpart” to the inverter, converting the 230V from the shore power to 12V from the battery, we thought it made sense. For comparison: To get external power, an additional battery charger is required, which also has to be connected to the battery. The biggest advantage of this combination: there is no need to install an external mains priority circuit. The device can, of course, internally recognize whether taping external or battery power for the 230V supply is necessary.